
Mixing Audio: An Easy-to-Follow Guide
August 30, 2022After you write and record your tracks, you’ll need to blend everything together with audio mixing. Audio producers unify each track recording during this process by balancing levels, panning, and audio processing. All of these components affect one another, but audio mixing makes sure that all of your tracks cooperate with each other. From here, you can move on to audio mastering.
Learning how to mix your tracks gives you complete control of the final product while teaching you how to produce like a professional. If you’re intimidated, there’s no need to worry because we’ve made the process as simple as can be with this easy-to-follow guide.
Understand the Terminology
So, you’ve finally recorded your first track, but now you’ll need to balance out your mix so it’s ready for audio mastering. Before getting started, it’s essential to know the following audio mixing terms. Once you understand the language of audio mixing, it’s much easier to communicate your artistic vision and collaborate with others.
Vocal Pitch Correction
Even the most gifted vocalists aren’t pitch perfect, but that’s okay because we have vocal pitch correction to fix these problems during audio mixing. Although most recording artists have the skill and talent to deliver high-quality vocals, even the most minor errors can throw off your entire mix. Before the 1970s, music producers could only correct vocal lines by starting over and re-recording them. Fortunately, modern DAWs with vocal pitch correction features allow audio producers to save time and bring out the best in their vocalists.
EQ
In audio production, the term “EQ” is shorthand for Equalization. Simply put, this plug-in allows you to alter your mix’s frequency, ensuring that all your components blend together perfectly. While there is nuance within the EQ process, the best way to learn about this function is by simply turning the EQ knob until your mix has a balanced sound.
Audio Dynamics
Audio dynamics refers to the variation level between the volume of each musical instrument. The distance between each instrument’s loudest and softest level is called the “dynamic range,” and audio producers measure dynamic variations using decibels (dB). It’s important to understand audio dynamics and the dynamic range because you’ll need to make adjustments during audio processing, but we’ll explain that later.
Choose the Right DAW to Create a Balanced Mix
Digital Audio Workstations (DAWs) are one of the most innovative, revolutionary tools in the history of audio production. If you’re ready to create mind-bending music, It’s impossible to overstate the importance of choosing the right DAW. Your DAW is the powerhouse behind every component of your mix. As an audio producer, you should aim for a DAW that’s intuitive and easy to use so that the mixing process goes smoothly from start to finish.
In the simplest terms, a DAW allows audio producers to record sounds from any instrument imaginable and arrange these sounds into a cohesive song before exporting the finished product into an audio track that listeners can stream anytime, anywhere. With the right DAW, you can record, mix and master your track to perfection.
Using Soundtrap
Learning how to mix a track can get pretty complicated, especially when you’ve been playing back the same mix for hours on end. If you’re an eager audio production student or a teacher ready to bring creative expression to your classroom, Soundtrap for Education is the DAW of your dreams. When students need input from a fresh set of ears, Soundtrap’s cloud-based technology allows them to ask for help and collaborate at the touch of a button. Students can learn every element of audio mixing in a safe, secure digital environment, from audio panning and rhythms to mixing automation and more.
Complete with advanced collaboration features, Soundtrap’s innovative audio production technology can integrate seamlessly with any wifi-connected device. This way, students can begin mixing their musical masterpieces in the classroom and polish their projects at home.
Whenever students need a helping hand while mixing audio, teachers can provide feedback at a moment’s notice. But that’s not all Soundtrap for Education has to offer. Teachers can also use this revolutionary DAW to create new assignments and track student progress, which makes it easier than ever for students to master the art of audio mixing.
Getting Started with Audio Mixing
You might be nervous if you’ve never mixed a track before, but the best way to learn is simply by getting started. Audio mixing might be complex, but it can be fun too! Especially when modern DAWs make collaboration so simple. Let’s get creative and experiment with audio mixing using these five easy steps.
1. Balance Your Levels
Before you get into the nitty gritty of audio mixing, you’ll need to balance your mix to have something to work with. Balancing your levels is when you make sure that each component of your mix is at the right volume so that they align with every other part of the song. This part is pretty easy, kind of like tidying up your bedroom. If there are glaring mistakes, you’ll fix them when balancing your levels, but most of the adjustments you make should be relatively small. Envision your final goal for the song and work towards it.
Make sure you don’t start any other part of the process before balancing your levels. Each section of your audio mix will have an instrument that is the loudest, and your song’s focal point is the loudest instrument. Most audio producers begin with the drums because it makes it easier for them to hear the difference between high and low frequencies.
Also, it’s important to consider the headroom when balancing the mix. The headroom is the distance between the mix’s highest peak and the 0dBFs. If you make the mistake of hitting the 0dBFs, you’ll end up with audio clipping and distortion. Once your mix has a solid foundation, you can add groovy plug-ins and other adjustments to create a more exciting song.
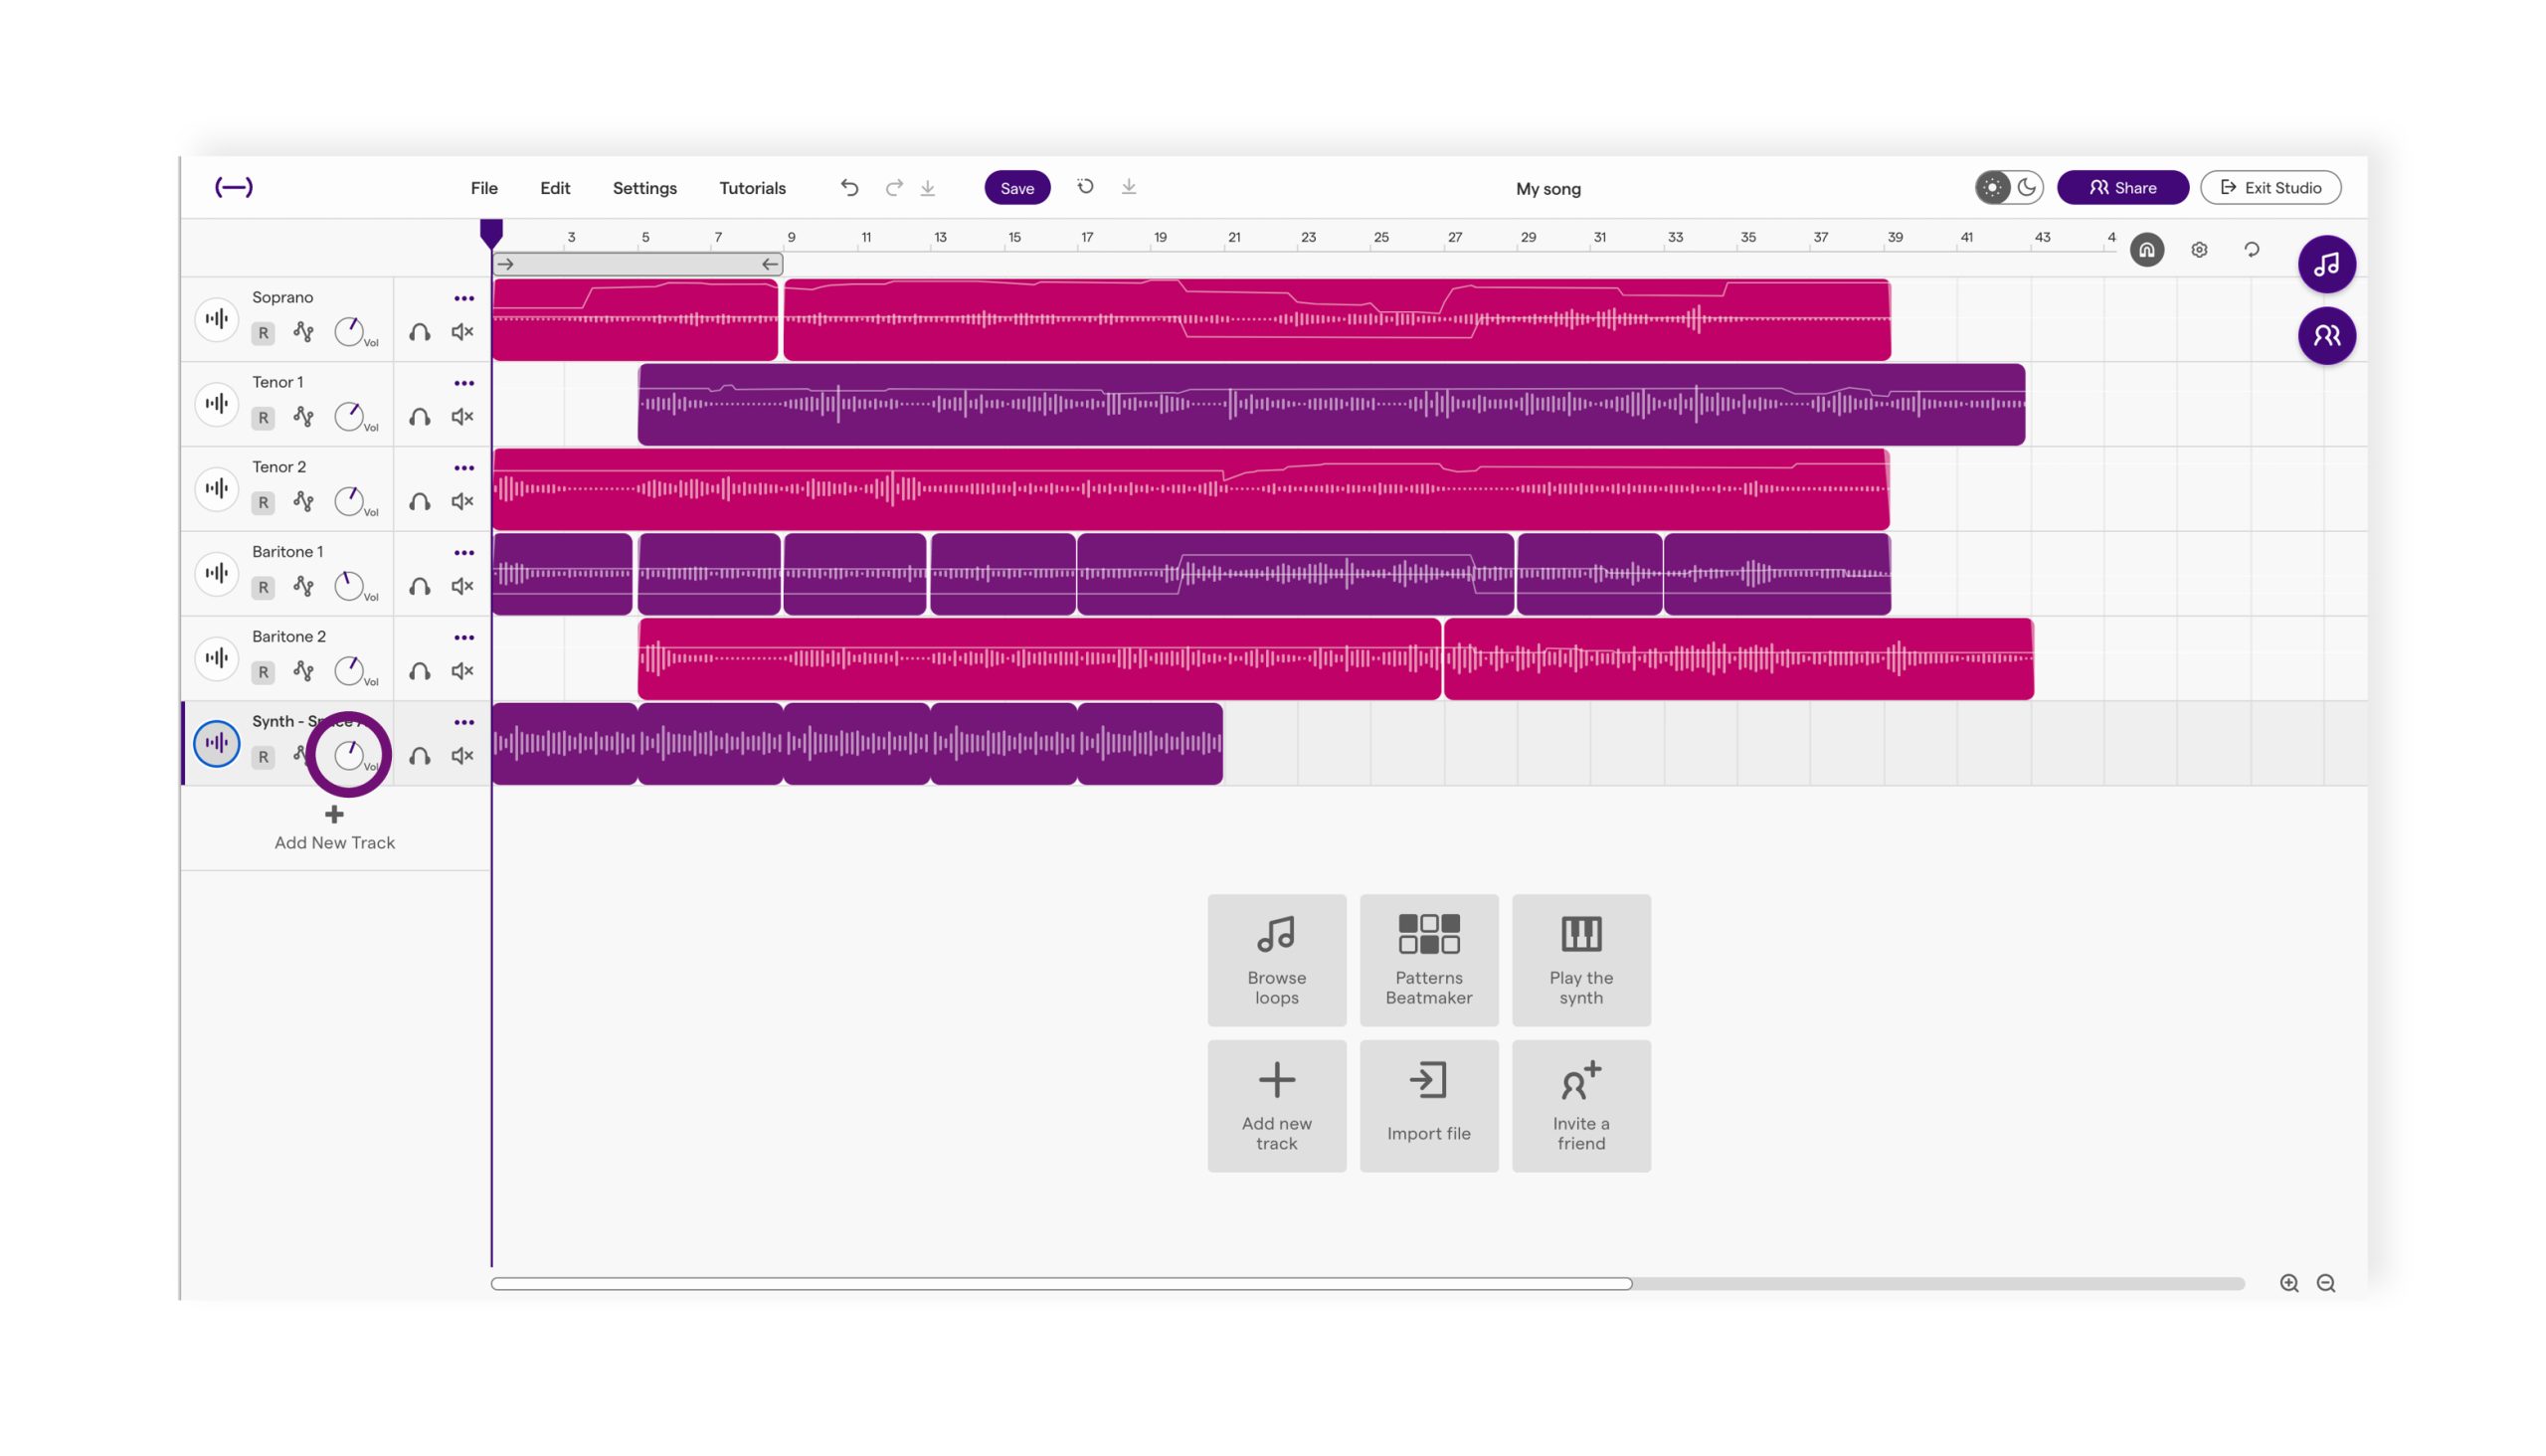
How to adjust levels in the Soundtrap Studio
2. Incorporate Panning
Audio panning is the process of putting sounds in different locations within the mix’s stereo image. With panning, you can move an instrument’s sound so listeners hear it in a specific location between the left and right speakers. In addition, you can also use panning to control each sound’s width.
When you’re mixing a track, you can expect to use a minimum of two speakers. As you play the sounds in your mix, you can use panning to change a sound’s volume. This helps it appear as the sound is coming from another location. For example, if you play a specific sound louder in the right speaker, listeners will interpret the sound as though it is located on the right side. To accomplish this, audio producers use a panoramic potentiometer, also known as a “pan pot.” In most DAWs, the stereo channel has two pan pots to control the left and right sides of the audio signal.
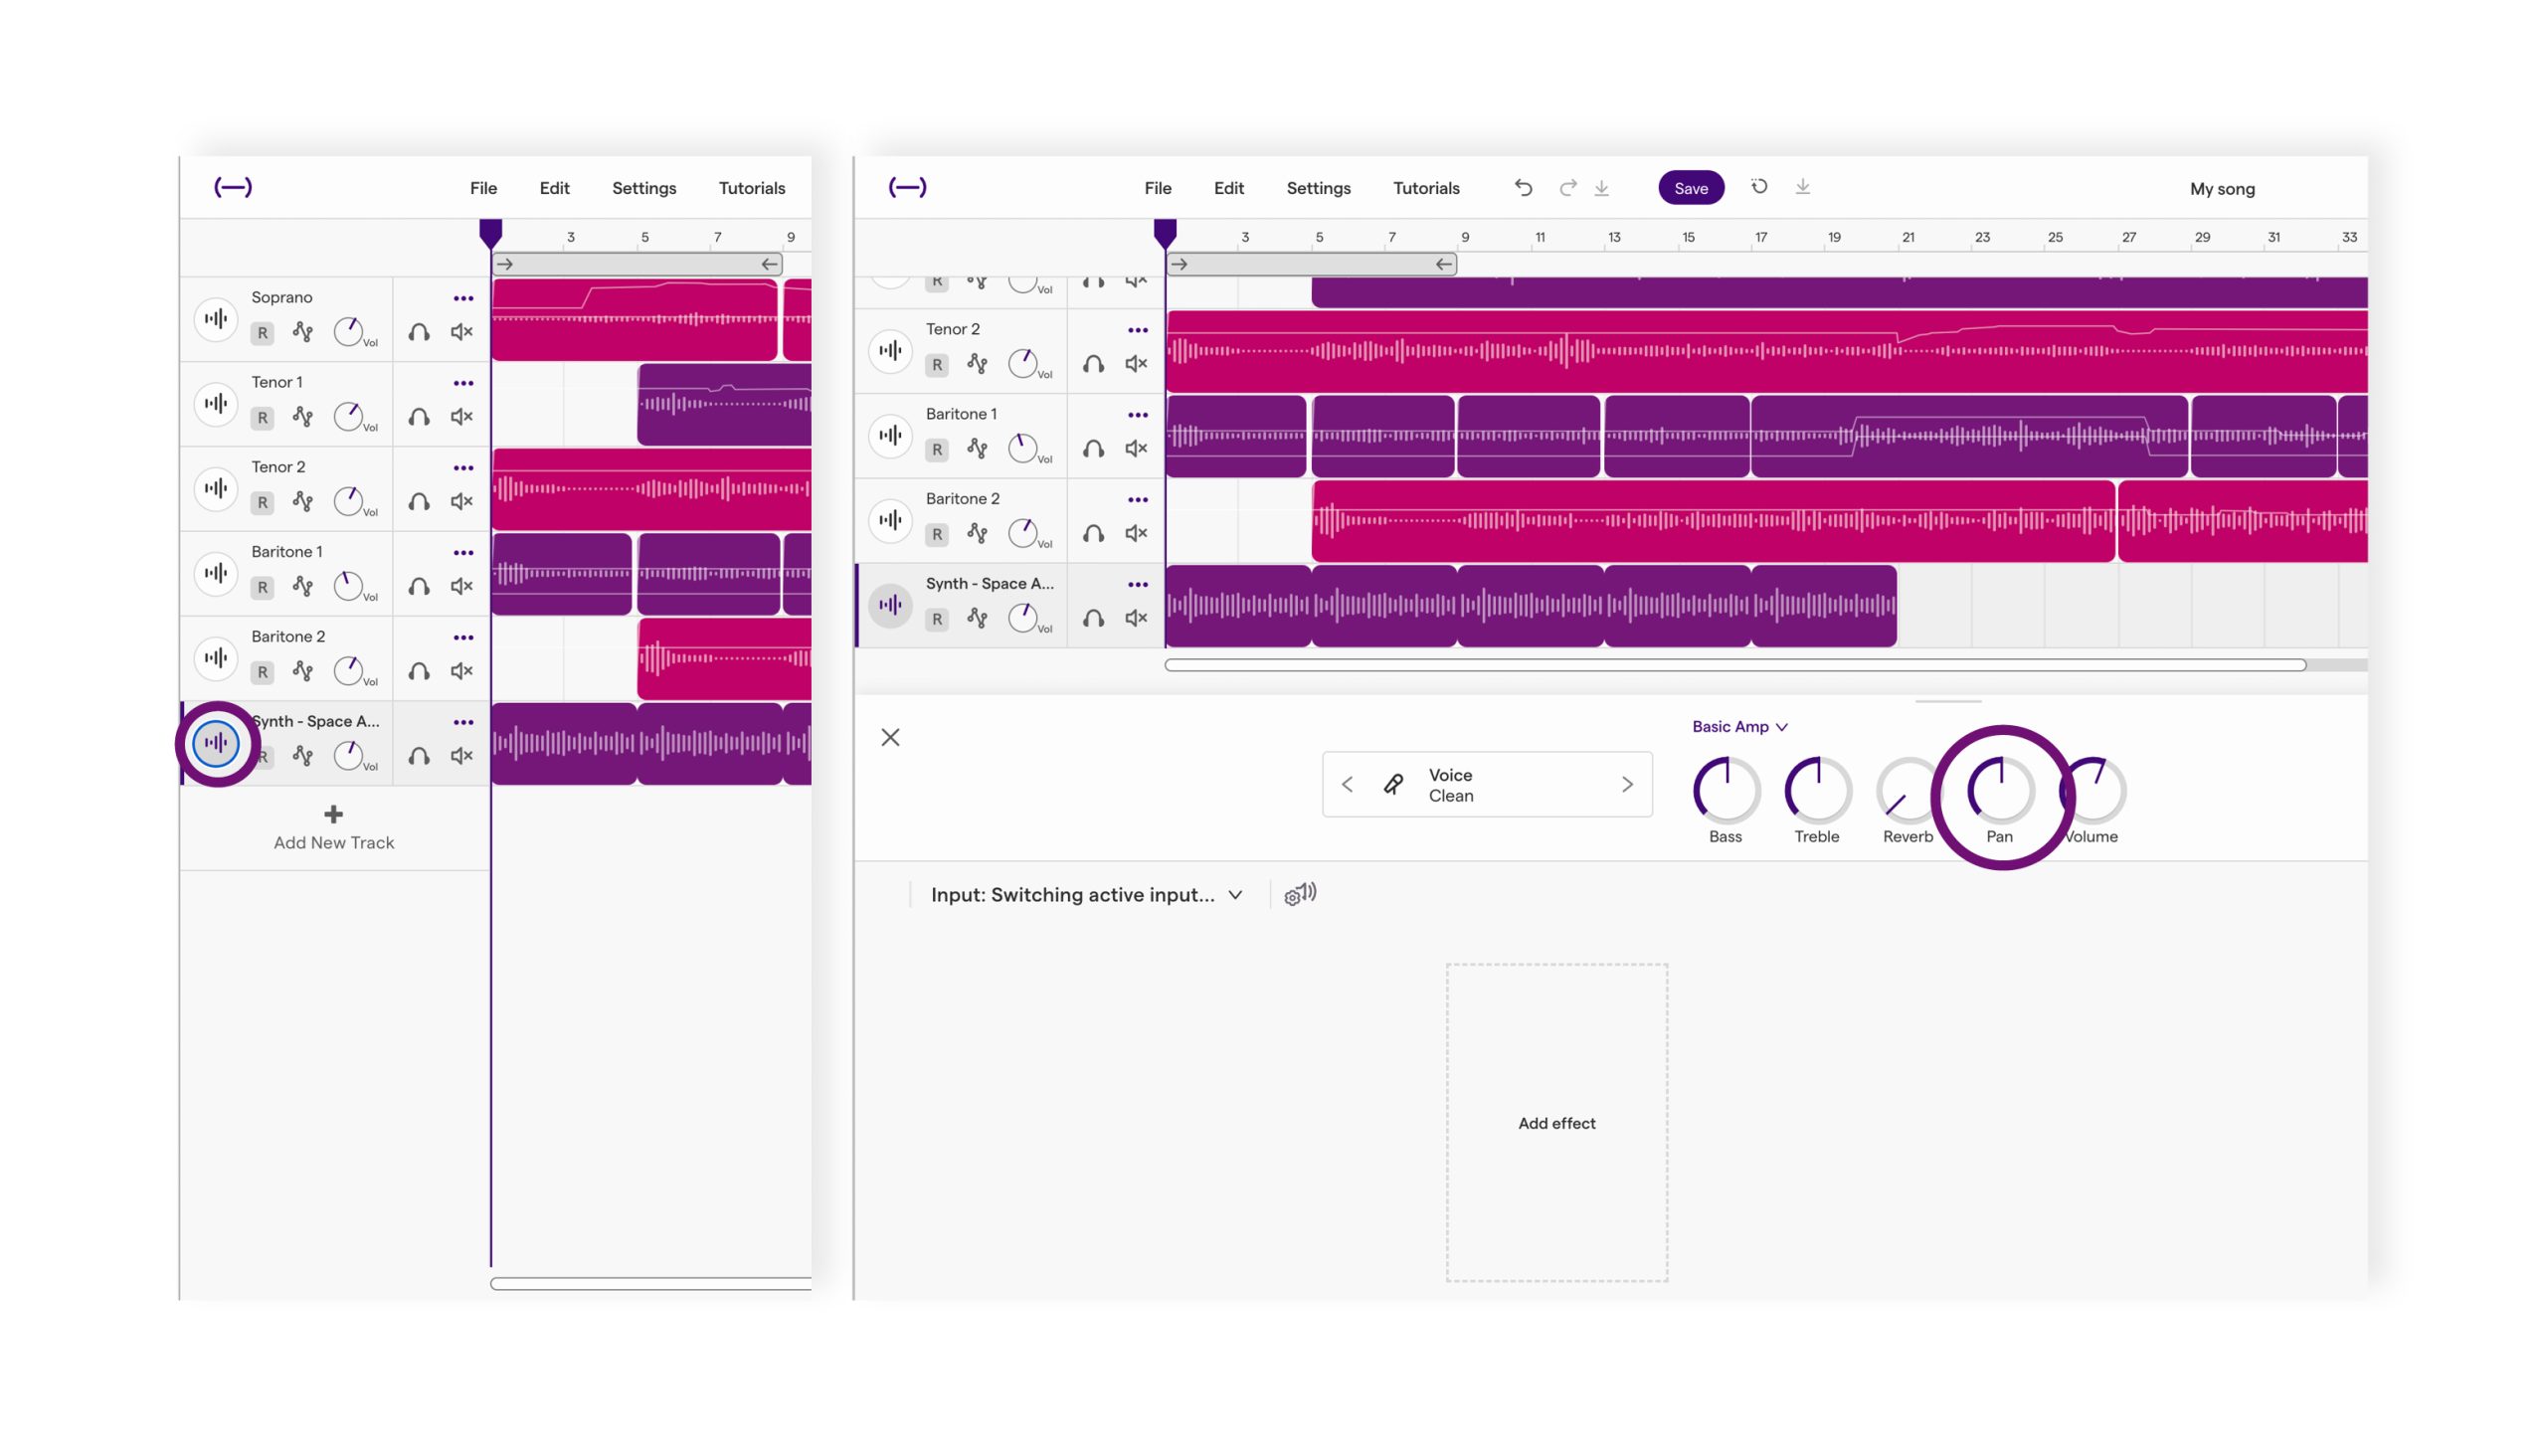
How to incorporate panning in the Soundtrap Studio
In practice
So, how does this play out in practice? Well, if you were panning a stereo recording of a guitar, you could spread the guitar across the stereo image by positing the pan pots to the hard right and hard left. If you wanted to make the guitar sound more narrow, you could move each pan pot toward the center of the track. The sound’s width will become narrower whenever pan pots are placed in the same area. In contrast, if you position the pots further apart, the sound’s width will increase.
Most audio producers keep heavier sounds in the center of the mix, which includes instruments like the bass and the kick. The lower sounds function as the focal point for the entire mix. The focal point give your mix a sense of structure as you position the lighter sounds. If you pan all of your sounds in the center, the mix will have a “crowded” sound. However, positioning too many sounds away from the center will create too much space within your mix.
3. Audio Processing
While audio mixing has many different components, most of the process occurs during audio processing. This audio mixing stage comprises three categories: EQ, Compression, and Reverb. If you can take care of these three components, the rest of your mix will fall into place.
As stated above, EQ is the process of balancing all the frequencies with a mix to create your desired sound. For instance, instruments with a low frequency have a heavy sound, such as a bass. In contrast, a snare or high-hat has a higher frequency because the sound is on the thinner side. You can edit the EQ using high and low pass signals. These signals allow you to set a limit for each audio signal.
Remember when we talked about audio dynamics? You’ll need to understand this concept to master audio compression because compression is controls the mix’s dynamic range. In other words, audio compression increases the quietest parts of the song. This decreases the loudest parts for consistent volume and a decreased dynamic range. Be careful not to compress your mix too much because that will lead to a dull, lifeless sound.
Now, you’re ready to play with the reverb for a bold, three-dimensional sound. Reverb works like magic – you can make your mix sound like you’re in a stadium or playing an acoustic song in your bedroom. However, in most cases, you’ll want to use a more subtle reverb. The most advanced DAWs come with presets you can use to get started. After choosing the right preset, you can continue to adjust the reverb until your mix sounds exactly how you hear it in your mind.
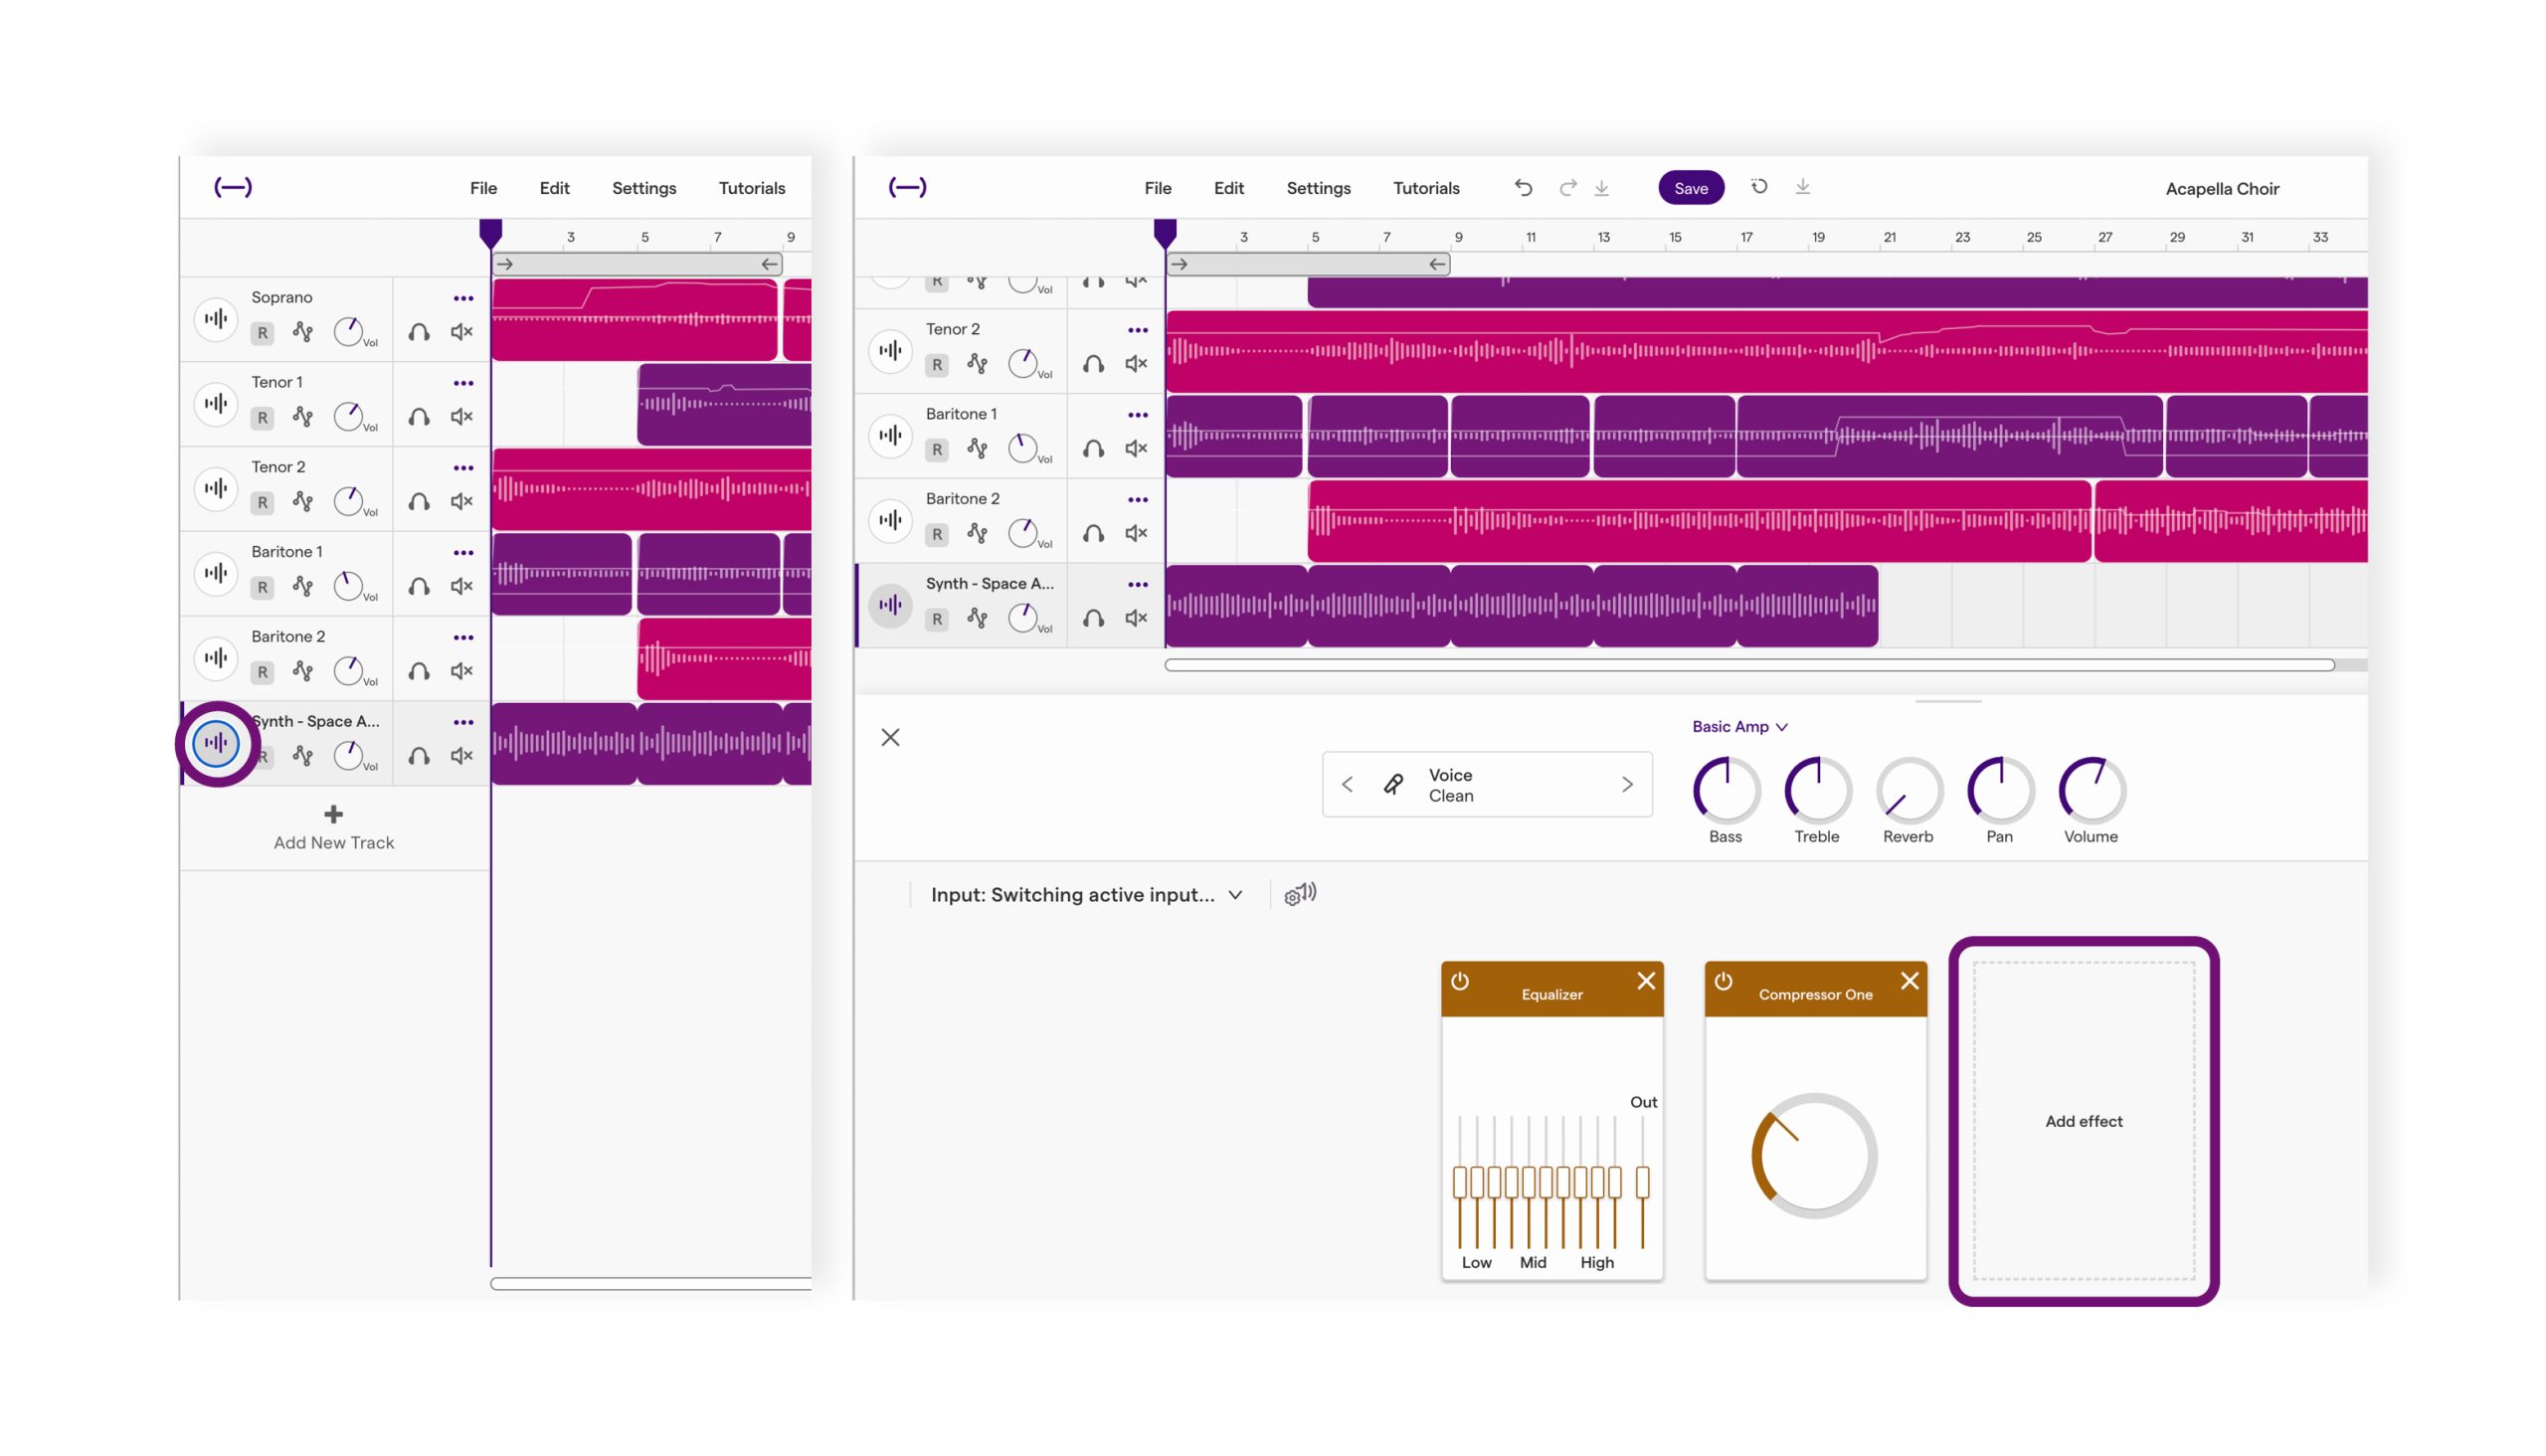
How to process audio in the Soundtrap Studio
4. Automate Your Mix
At this point, your mix is almost complete, and it’s time to add the finishing touches! After processing your mix and balancing the sounds, you might want to incorporate mix automation to polish the mix. With automation, you can make your DAW perform specific tasks for you.
Most audio producers use mixing automation to adjust the track’s volume. For instance, you could move a particular sound to the forefront of the track and then fade it out when another instrument comes in. Then, every time you play the track, the instrument will automatically make this adjustment. The adjustment ensures that you don’t need to manually adjust your mix every time you play it.
Start on a good note by listening to your mix from a fresh, unbiased perspective. How do you feel when you hear the intro for the first time? Does the chorus make you want to sing along? Now is the time to assess whether or not there is room for improvement.
Trust your intuition. If you’re pleased with how your song sounds, you may not need any automation. But if you do, you may want to start by listening to the percussion and accents, which could often benefit from a little automation. However, you can automate virtually any part of your mix with the right DAW.
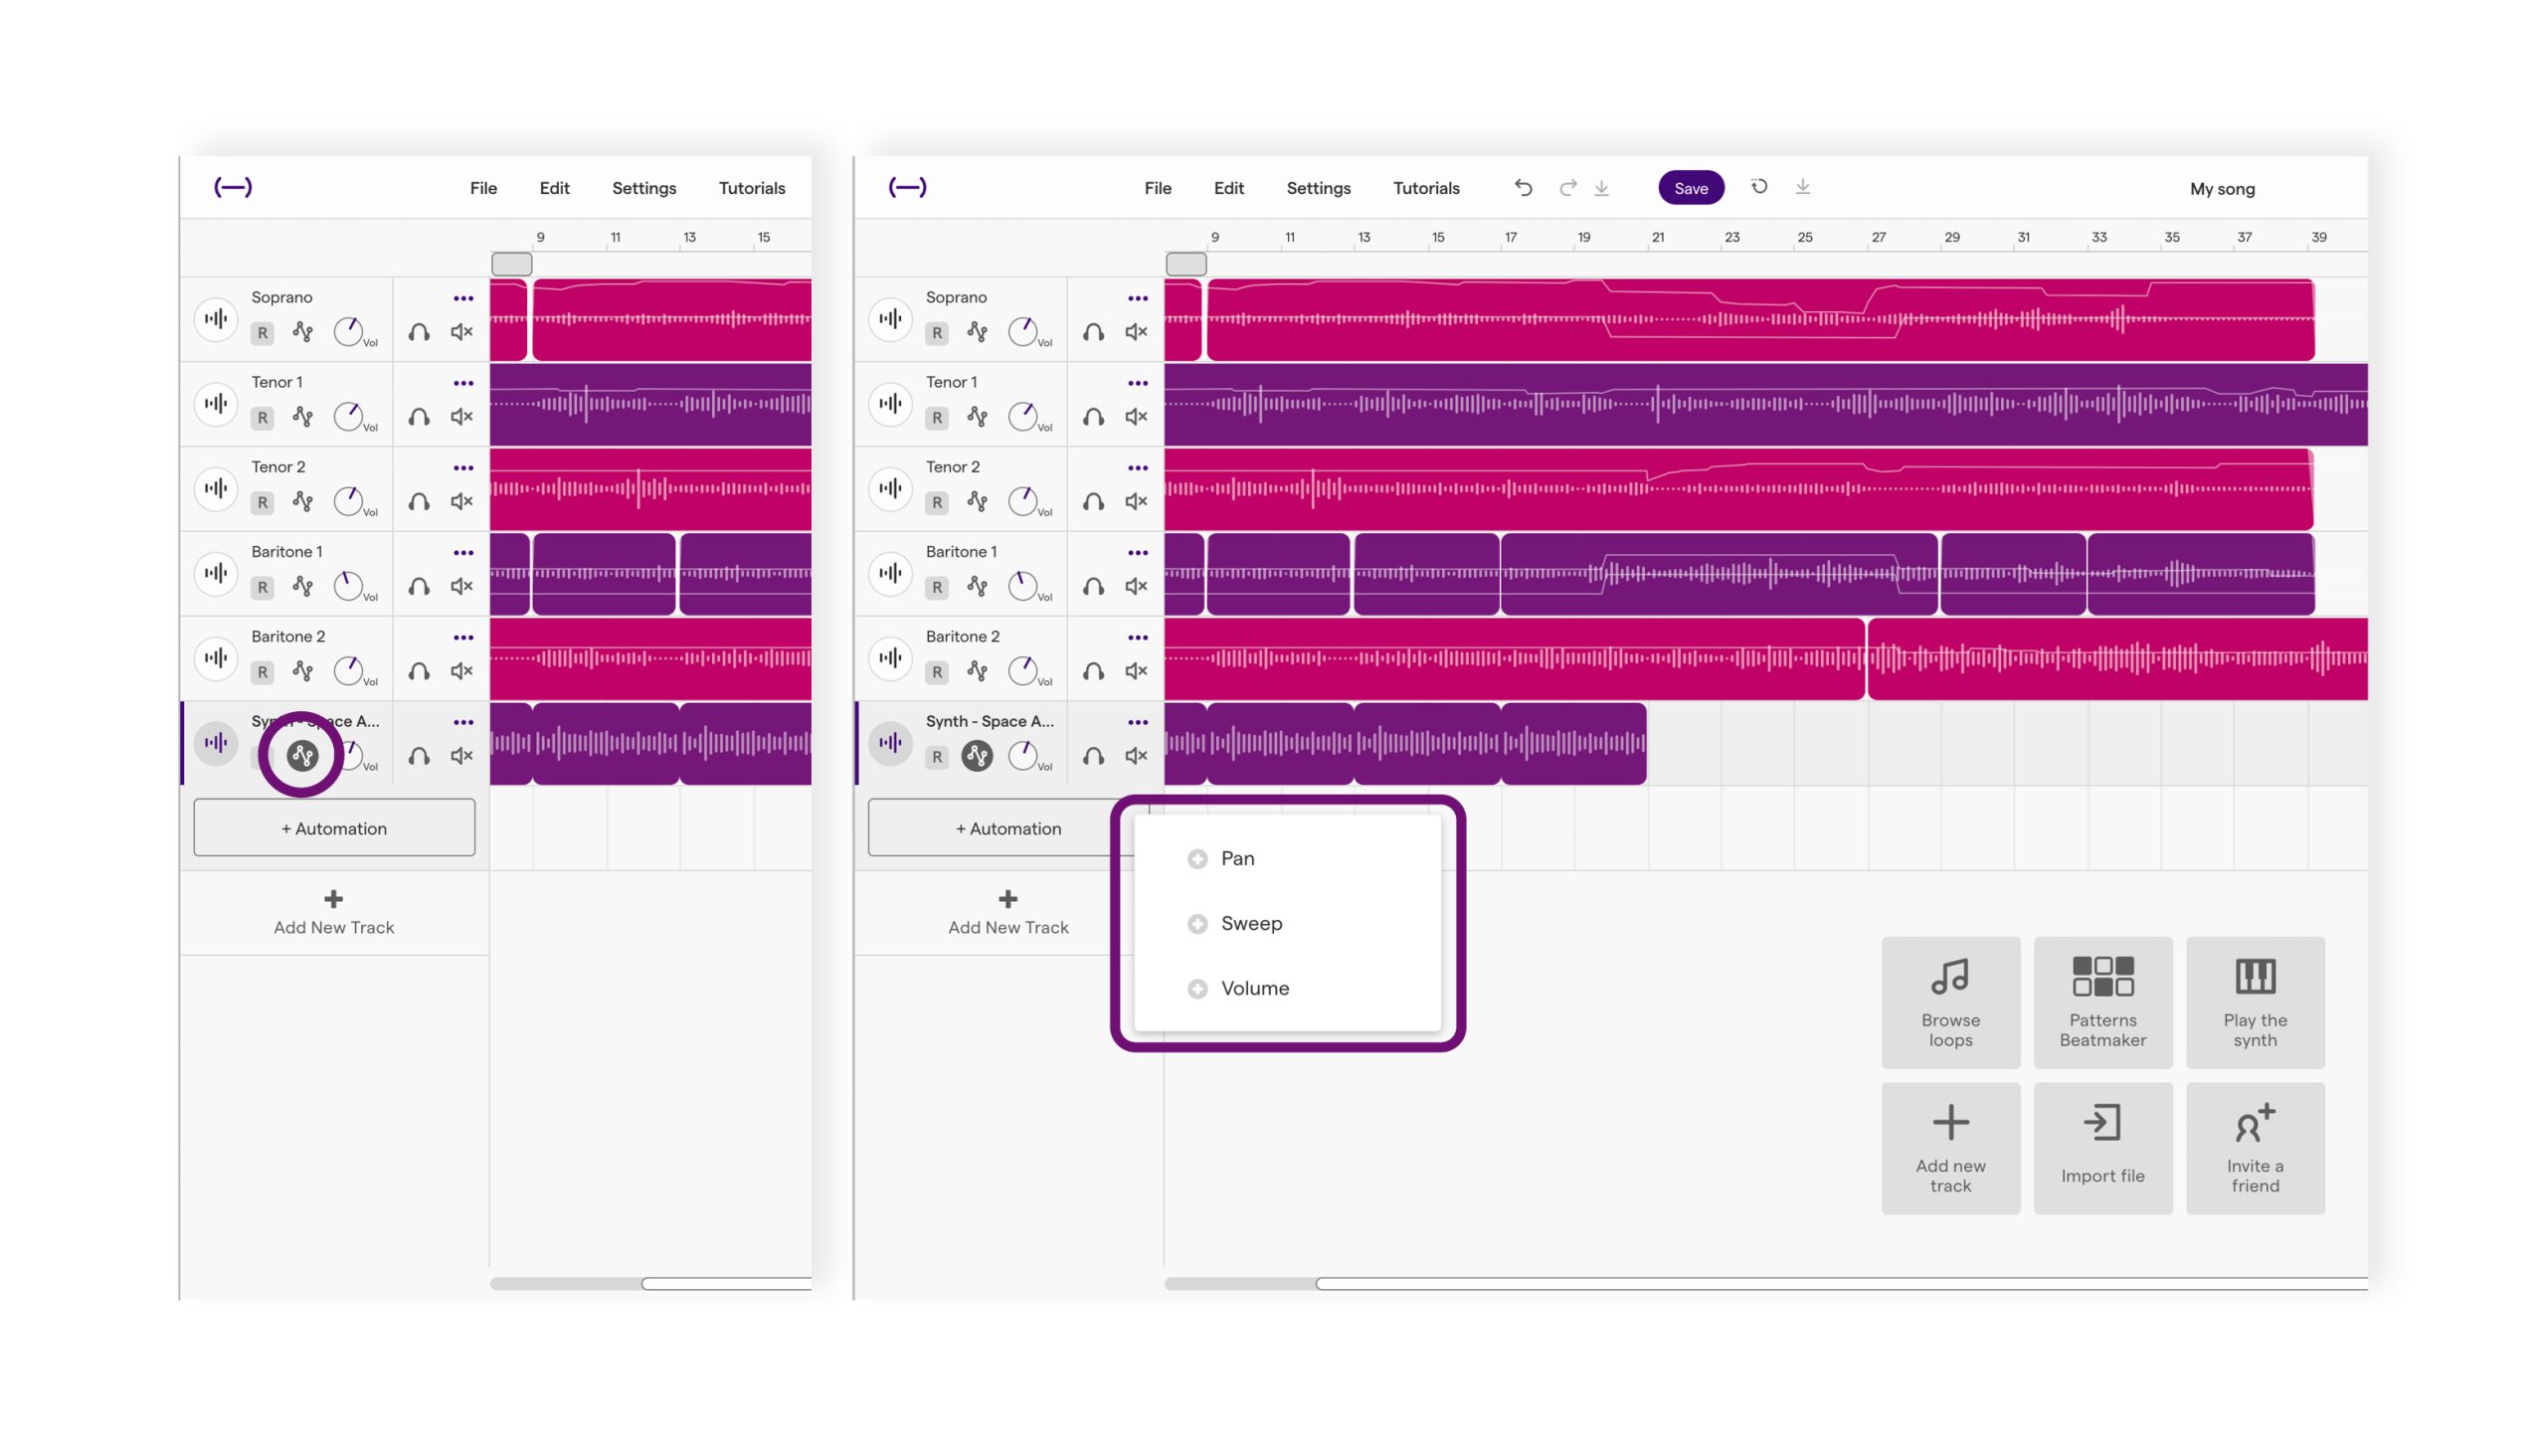
How to automate your audio in the Soundtrap Studio
5. Break the Rules
Innovative audio production is all about pushing the boundaries and breaking the rules. Once you have a solid understanding of audio mixing, give yourself the chance to create music, unlike anything you’ve heard. Intuitive cloud-based DAWs like Soundtrap for Education are made for you to collaborate with classmates and take chances to create something great. But, you can only do this if you’re not afraid to take risks! If you make a mistake, it’s okay because these are pivotal learning moments in your creative journey. Pretty soon, you’ll be mixing songs like a professional.
Mixing Audio is Easy with Soundtrap for Education
Soundtrap for Education is the ultimate audio production platform for students and teachers to create and edit audio recordings unlike any other. This innovative platform provides users with thousands of instruments, sounds, loops, and more for an engaging sonic experience. Students and teachers can easily tap into their artistic side with this intuitive audio platform that facilitates a creative learning environment for every subject and age.
With Soundtrap for Education, students and teachers can collaborate at any time, in any place with advanced cloud technology. In addition, the platform is equipped with a robust resource portal, complete with tutorials, and lesson plans to complete the educational experience. Teachers can ensure that student collaboration is safe and secure with invite-only groups in Soundtrap’s versatile digital environment.
If you’re ready to enhance your educational experience with an intuitive cloud-based audio production platform, get started today with Soundtrap for Education!